Pounce Patterns 101: A Guide to Precision Mural Installations
What’s a Pounce Pattern?
Okay, let’s cut to the chase… if you’re new to muraling, there’s a high chance you’ve never heard of a pounce pattern. So what exactly is a pounce pattern?
A pounce pattern is first and foremost a physical transfer guide made up of tiny holes. It’s a template created from your design that can be used to transfer a paper or digital design directly onto your mural wall at the correct scale.
If you grew up in the 90’s and early 00’s, you might remember the transfer paper craze… you know what I’m talking about - that angled, chunky plastic drawing board that was backlit? You put a printed design on the board, turned the light on, and then put another piece of see-through transfer paper on top and got to tracing. You could modify the size, and then trace any design you wanted perfectly. We were all suddenly regular Van Goghs! Though not exactly the same thing, the intended use is similar enough: using a specific product to reproduce an image exactly from one place to another.
How Do Pounce Patterns Work?
The way a pounce pattern works is actually very simple.
Here’s a high-level breakdown (we’ll get into the details later): Create a paper template of your design, affix it to your blank mural wall, and then dust a powdery substance all over. Once finished, remove the template and you are left with powder marks that act as a blueprint for the actual mural installation. The design has officially been lightly transferred onto the wall, and you can get to work painting.
Why Use Pounce Patterns?
Here are the main benefits of using pounce patterns to as a mural transfer technique:
Enables accurate scaling from design to wall
Speeds up installation by using a ready-made guide
Improves edge clean-up and definition for crisp, clean, professional looking murals
Allows for smoother collaboration: designers provide patterns, installers execute them consistently. Multiple muralists can also confidently work on the same project and trust the design will look consistent across the mural
When To Use Pounce Patterns
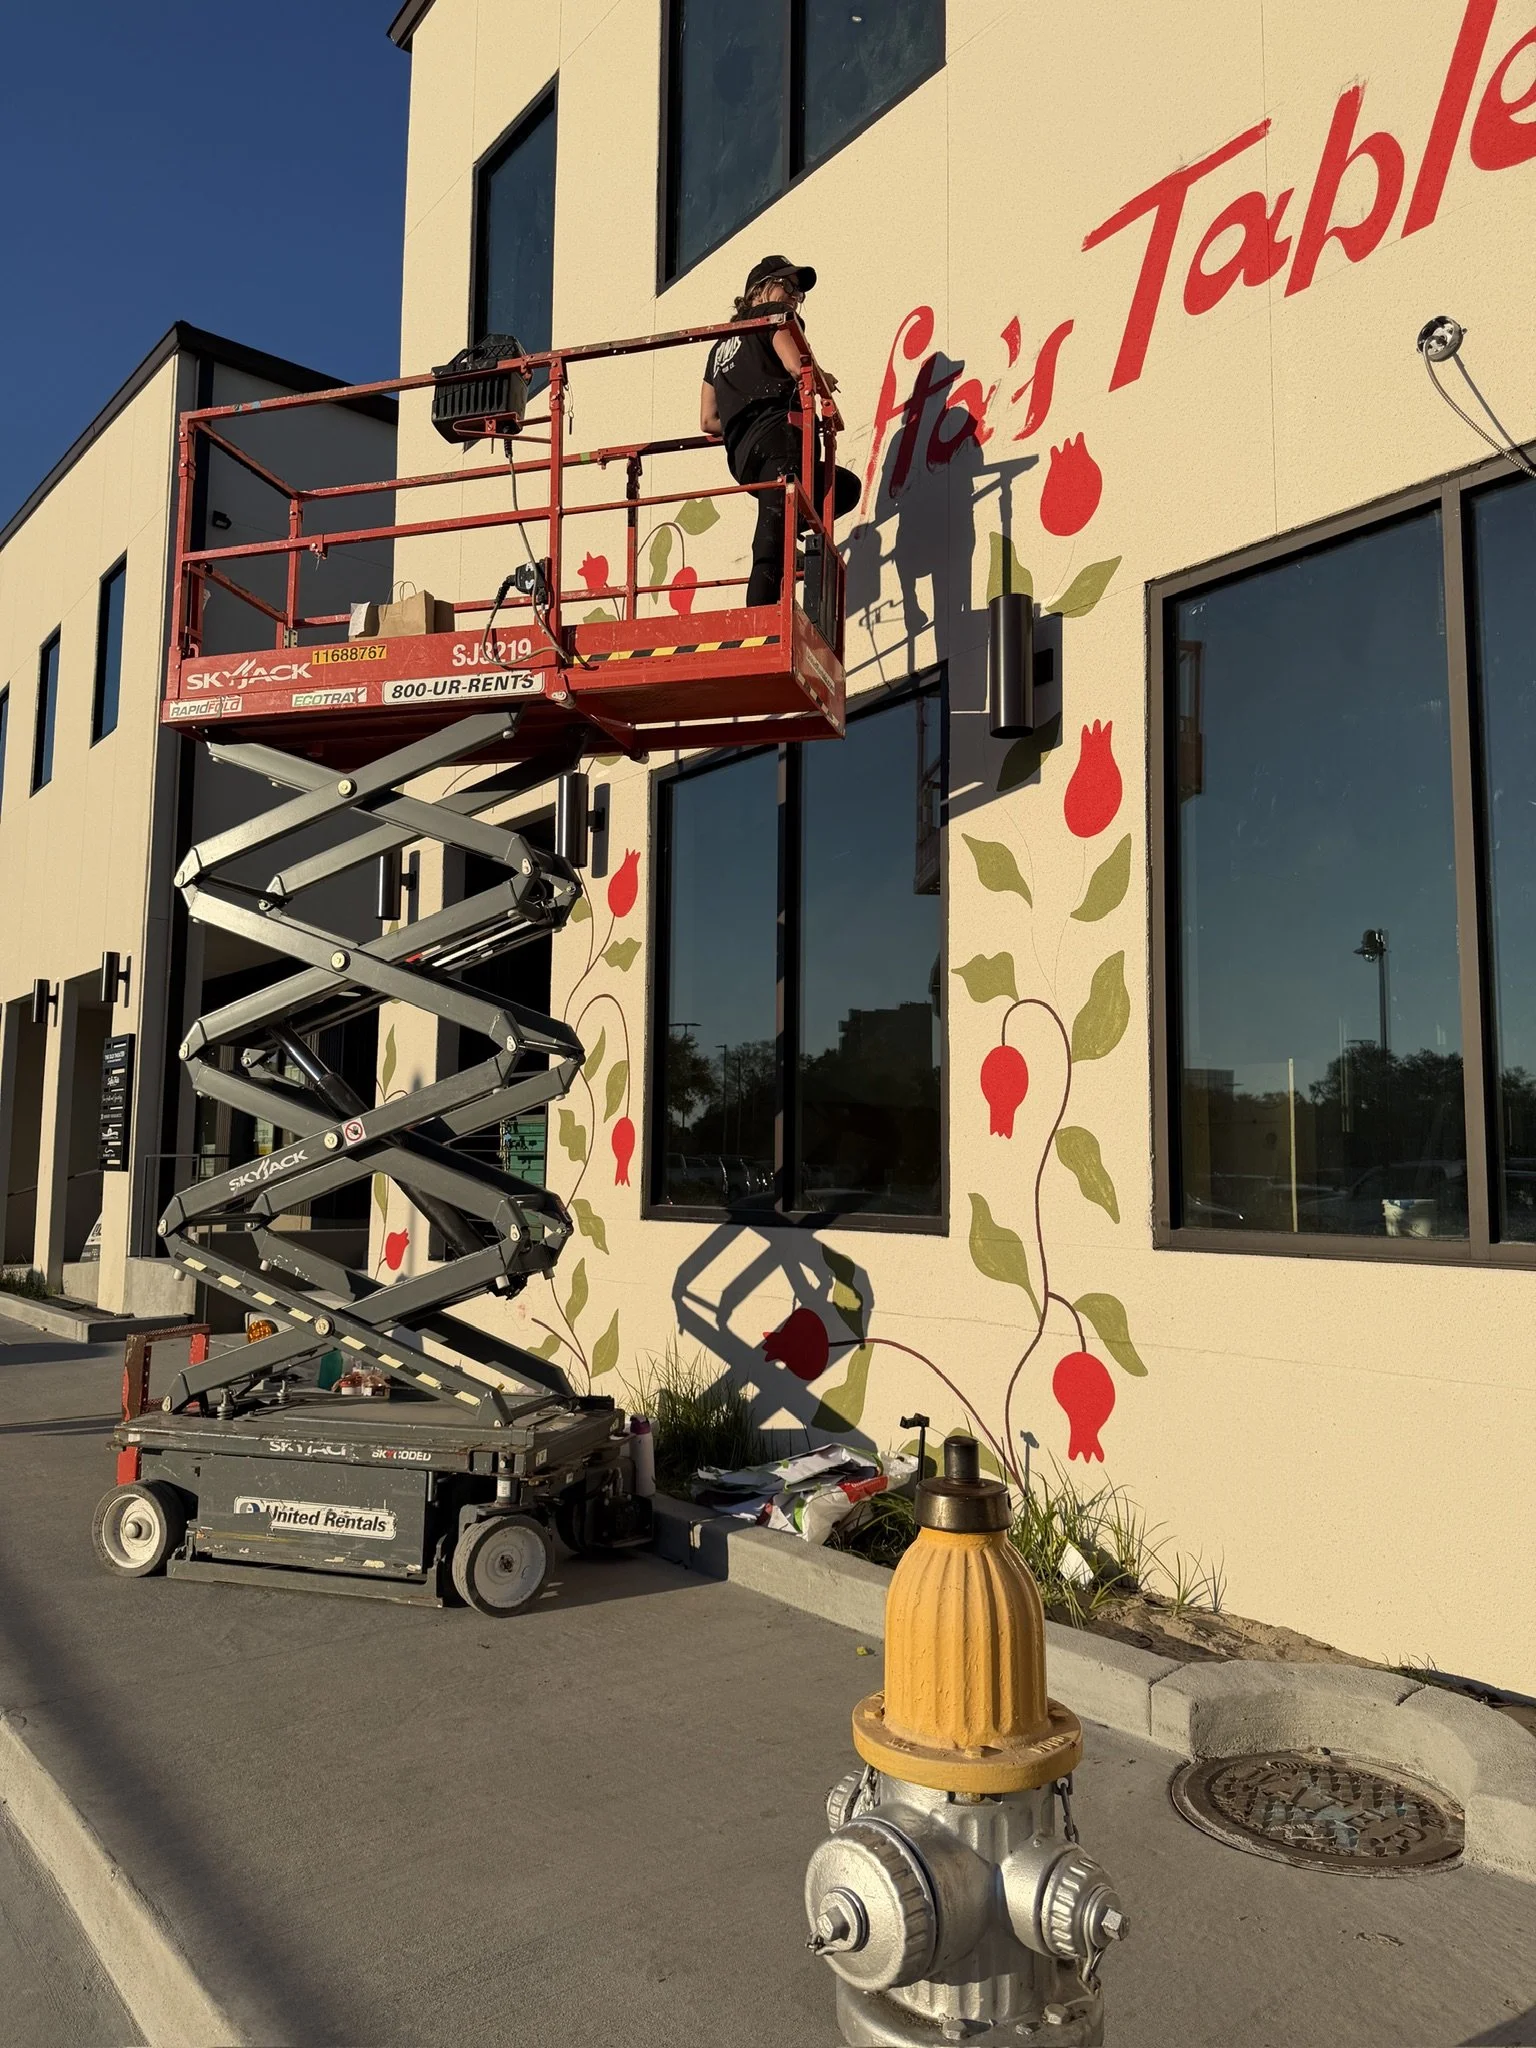
As you are probably well aware, there are a lot of techniques to consider using when installing a mural. Each mural demands its own unique process in order to achieve the best result. We personally love to use pounce patterns when the light around the mural surface is too bright for a projector, and when we have multiple painters working on the project. It helps the design stay super consistent looking, despite many different hands working on the project. It’s also a great technique to use if you’re painting a mural in a tight space, or around a curved pole (as an example). While a projector can sometimes stretch the image by throwing it around the pole, a pounce pattern can be taped up basically anywhere without the integrity of the design being affected.
Consider using a pounce pattern if your mural:
Contains complex motifs with repeating designs or grids
Is large and requires accurate scaling
Is being installed on a consistently flat surface with minimal texture
Requires brand-consistent line weights across multiple sections
Has a tight timeline and accuracy can’t be compromised
Comparing Tools of the Trade:
Hand Pounce Wheel vs. Electro Pounce Machine
When you’re collecting your tools for your pounce pattern, you’ll find that there are two main tools available. A hand pounce wheel, and an electro pounce machine. From our experience, the only reason to choose an electro pounce machine is if you are using pounce patterns all the time (sign painters, for example, typically favor the machine to save time). If you’re a casual muralist or not using pounce patterns frequently, we find the hand pounce wheel does the trick - at a fraction of the cost. Here’s a breakdown of both tools to help you choose the one that’s going to be best for you and your business:
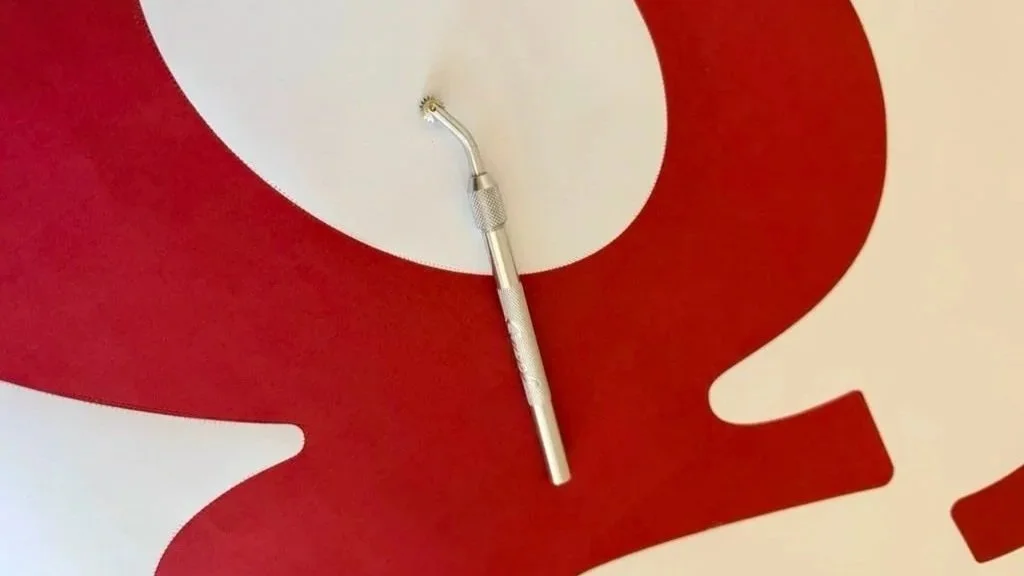
Hand pounce wheel (manual)
Purpose: Creates perforations or a dotted transfer pattern from your design onto paper, fabric, or parchment by rolling a wheel with teeth over the pattern to leave perforations.
How it works: A toothed wheel is rolled along the edge or across the surface of the pattern. The teeth punch through the paper and leave a dotted guideline on the receiving surface. You typically trace the pattern by hand with the wheel or use a sheet to transfer the design.
Power source: Human effort!
When a hand pounce wheel makes sense:
Small projects or one-off patterns/murals
When you need to transfer a design quickly and you don’t have access to a power source
If you’re working on a delicate surfaces that might be damaged by a powered device
Electro Pounce Machine
Purpose: Transfers patterns or designs using electronic control to create evenly spaced holes or to guide a cutting/marking action with precision.
How it works: An electronic device generates small holes or marks according to a digital pattern. It can be used with punch heads, needle arrays, or another marking mechanism to precisely transfer lines from a pattern, through a sheet of metal, and onto the final surface.
Power source: Plug-in or battery
Step-by Step: Using an Electro-Pounce Machine
1. Set Up the Ground: Attach the alligator clamp (ground wire) securely to a metal table or a sheet of metal.
2. Position the Pattern: Lay your pattern paper directly onto the metal surface.
3. Turn on the Machine: Switch on the electro-pounce unit.
4. Trace the Design: Use the stylus wand to trace your design. The closer the tip is to the metal (without touching), the more consistent the arc.
5. Perforate: The machine will burn small, closely spaced holes along the line.
6. Pounce: Once the pattern is traced, remove the paper, place it on your final surface, and dust it with powder to transfer the image.
Key Tips and Safety
Foot switch: Use a foot switch to activate the spark only when the wand is on the paper to prevent unnecessary arcing
Safety first: Do not touch the tip of the wand while the machine is on
Dry environment: Always use the machine in a dry, safe, and non-flammable area
Storage: Keep the tip in a holder when not in use to avoid accidental burns or damage
When an electro pounce machine makes sense
Large scale projects when the turnaround time is tight and speed is a necessity
Situations where you want to minimize hand fatigue
If you paint a lot of logos or are consistently doing sign painting
step-by-step: Making and using pounce patterns
Now that you have a general idea of what a pounce pattern is, how they work, and why you might consider using one to install your next mural, let’s walk through how exactly you are going to use this technique IRL.
Tools You’ll Need
Here’s a list of what you need to get started with your pounce pattern - including links to the exact products we use.
Cardboard
Powdered chalk (preferably blue)
Dust mask
Blueprint paper/ your design printed to scale
Creating your template
For this example (and ‘cus its 2026), we’re going to assume you are creating your mural design on an iPad - or at the very least, digitally. (If you’re working by hand, these instructions will translate basically the same - just draw your design on paper the size of your mural instead of printing it out.)
Finalize your design and export it however you like to print your art, taking into consideration the size this design will be once installed
Head to your local printing store (FedEx or Staples typically does the trick) and have your design printed out on the largest pieces of paper they have. Your design may not fit on just one piece, and that’s okay. You can just print it across multiple different pieces of paper and tape them together to create your physical template.
Pandr Tip:Print your design on blueprint size paper.Staples offers blueprint engineering prints in four standard industry sizes:
18” x 24”, 24” x 36”, 30” x 42”, 36” x 48”Once the design has been printed and assembled, lay it across something even and firm that your pounce wheel will be able to bear into as you are tracing. The wheel needs to be able to puncture the paper cleanly and easily.
Pandr Tip: Keep a piece of cardboard behind the paper template so that the pounce wheel punctures through and doesn’t ruin your table. Put those old Amazon boxes to good use!Grab your pounce wheel and get to work! Roll it all along the lines of your design that you want to be transferred onto your wall. Wherever you roll that pounce wheel, a trail of little holes should follow.
Once you’ve traced out the entire design using your punch wheel, hold your paper up to the light. You want to clearly see light coming through each hole - this means the transfer powder will be able to easily leave its mark.
Pandr Tip: If some of the holes look too small, use a fine grit sandpaper on the punched through side to help open up the holes through the paper.
Transferring Your Design From Your Template to Your Wall
Okay, your template is ready to go. Now the fun part happens!
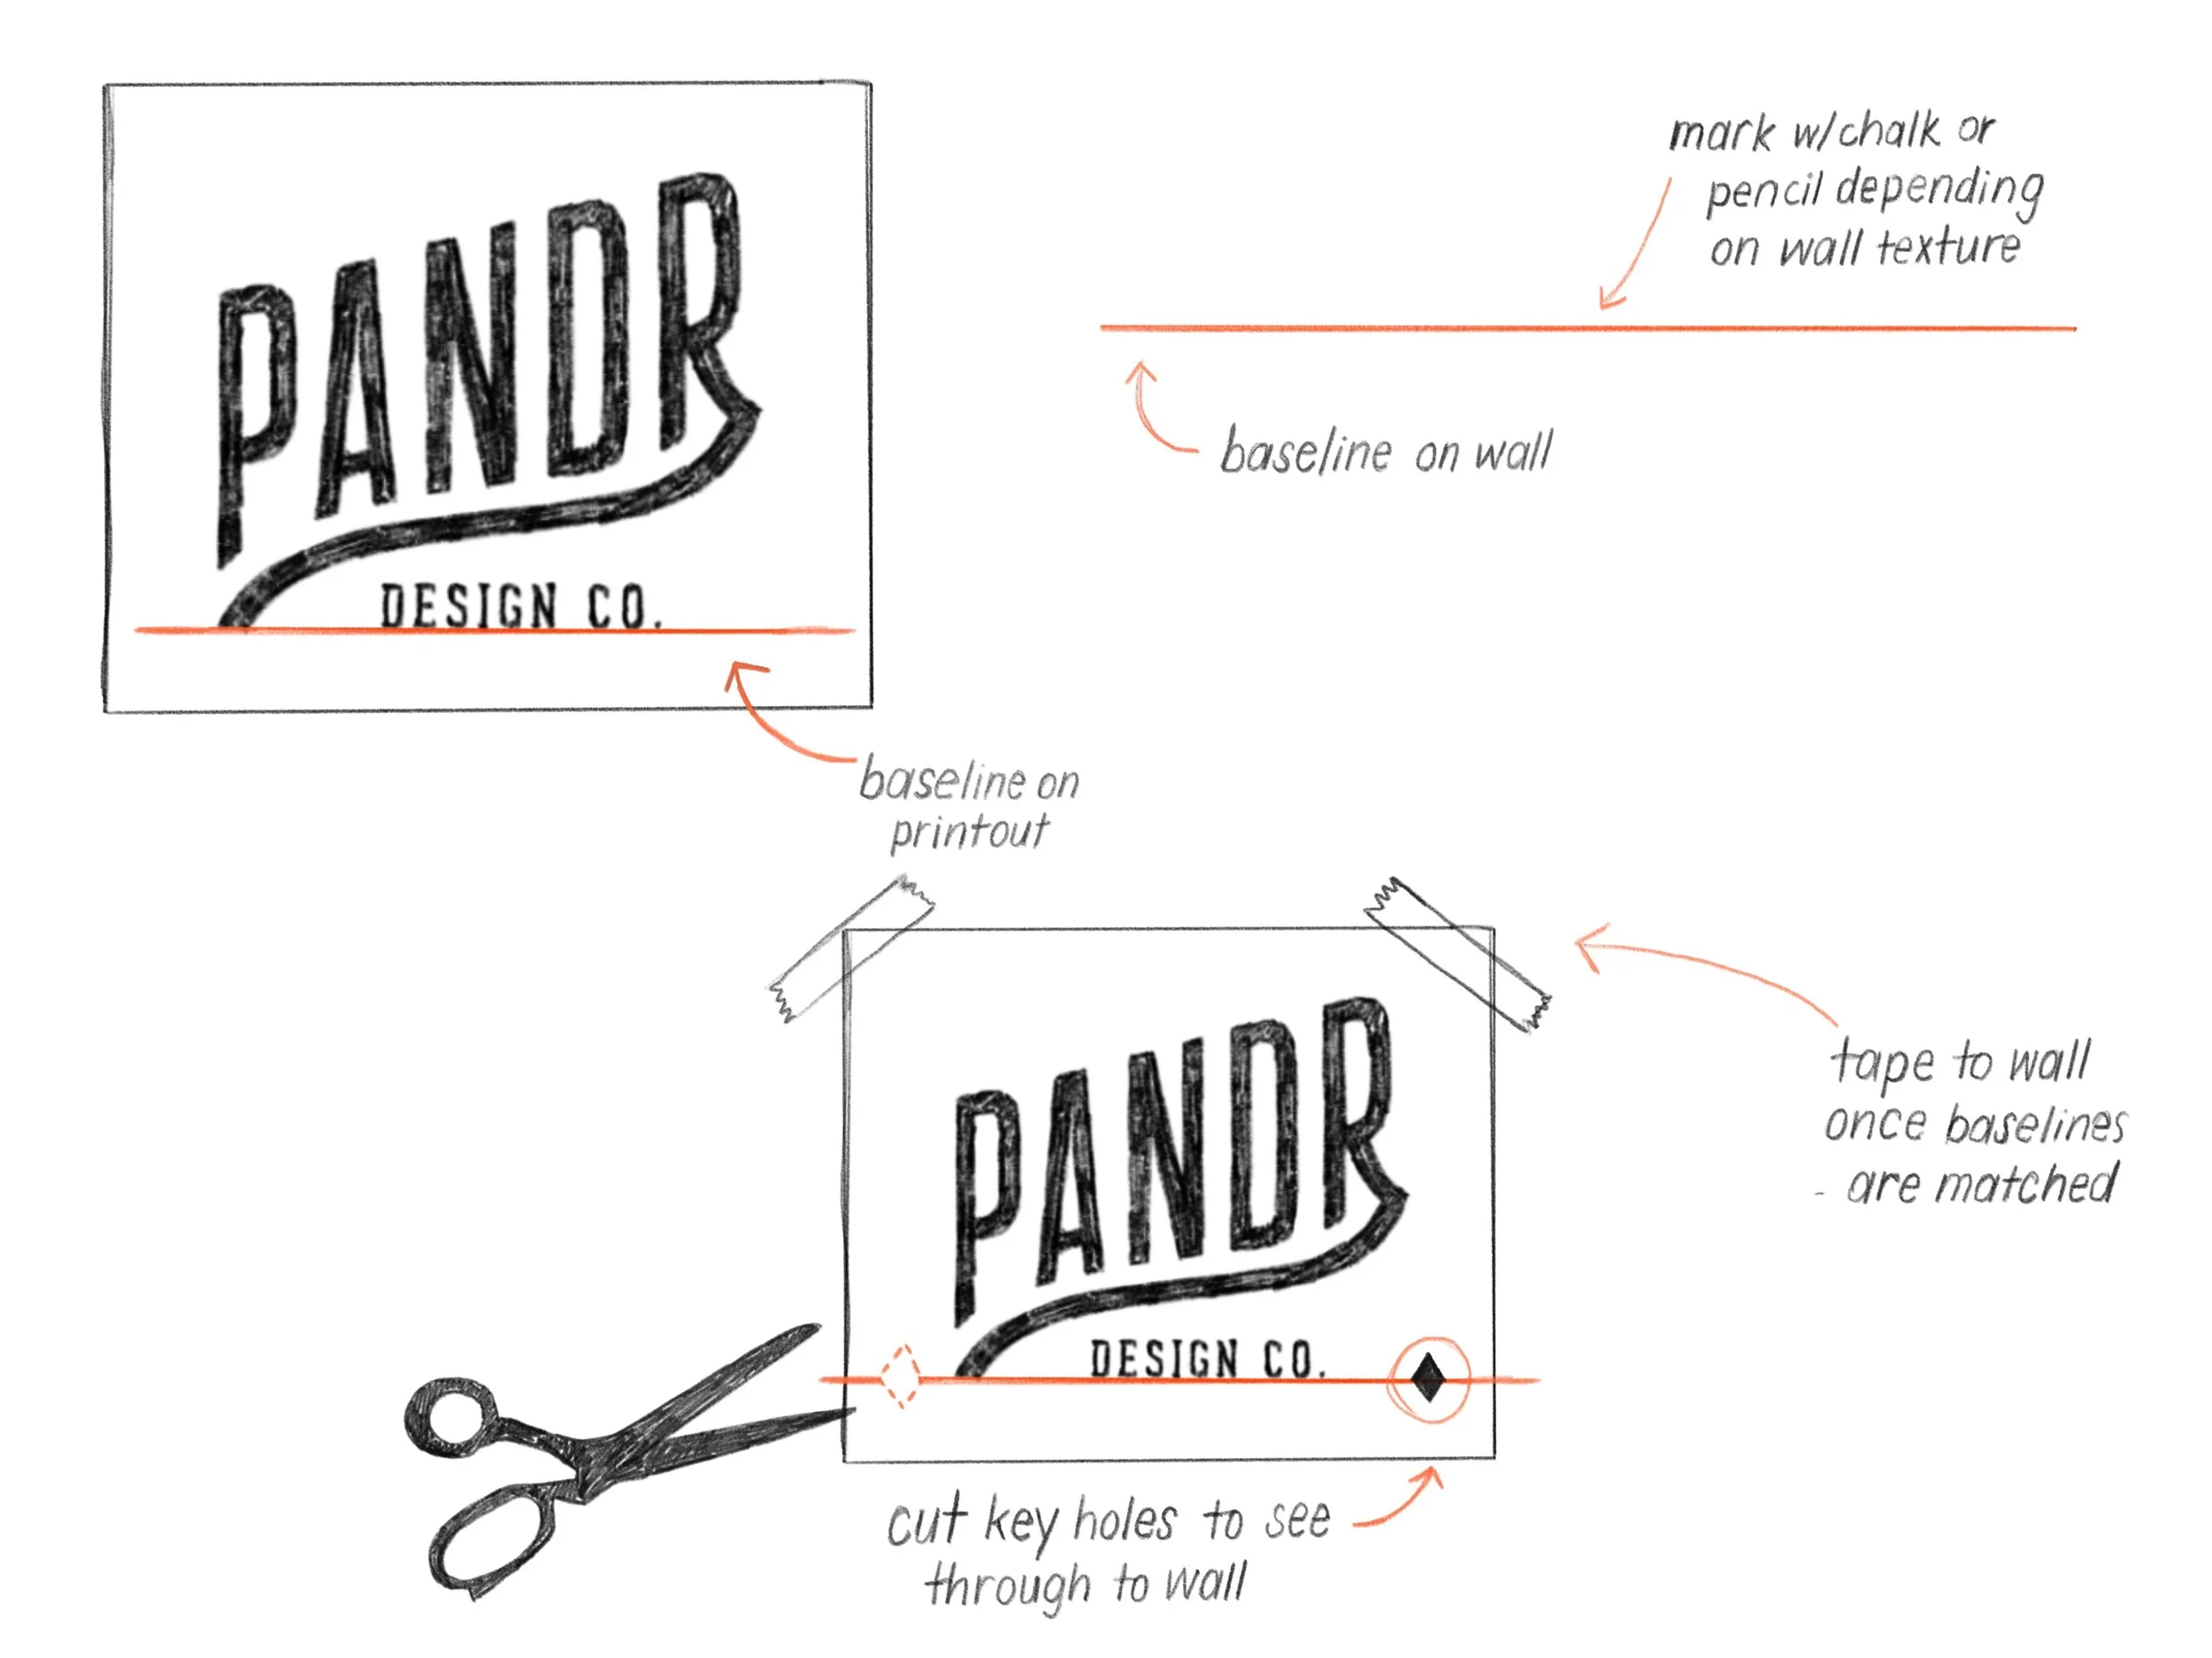
Establish a “baseline” that your design will sit on. Grab your level and your pencil or chalk and mark straight lines (your baseline) on the wall where the top or bottom of the design will sit.
Do the same thing on your design. Trace or draw a corresponding baseline on your paper template so it mirrors the wall line exactly.
Along the baseline on the template, cut two or three small “key holes” (tiny slits or holes). This allows you to perfectly match up the baselines you’ve drawn on the template to the baselines on the wall.
Once things look well-aligned, use painter’s tape to secure the paper template to the wall.
Stand back and check alignment. If anything looks off, adjust the template’s position until the baseline lines up perfectly with the wall line, and is laying flat and secure so nothing is shifting around during the transfer process.
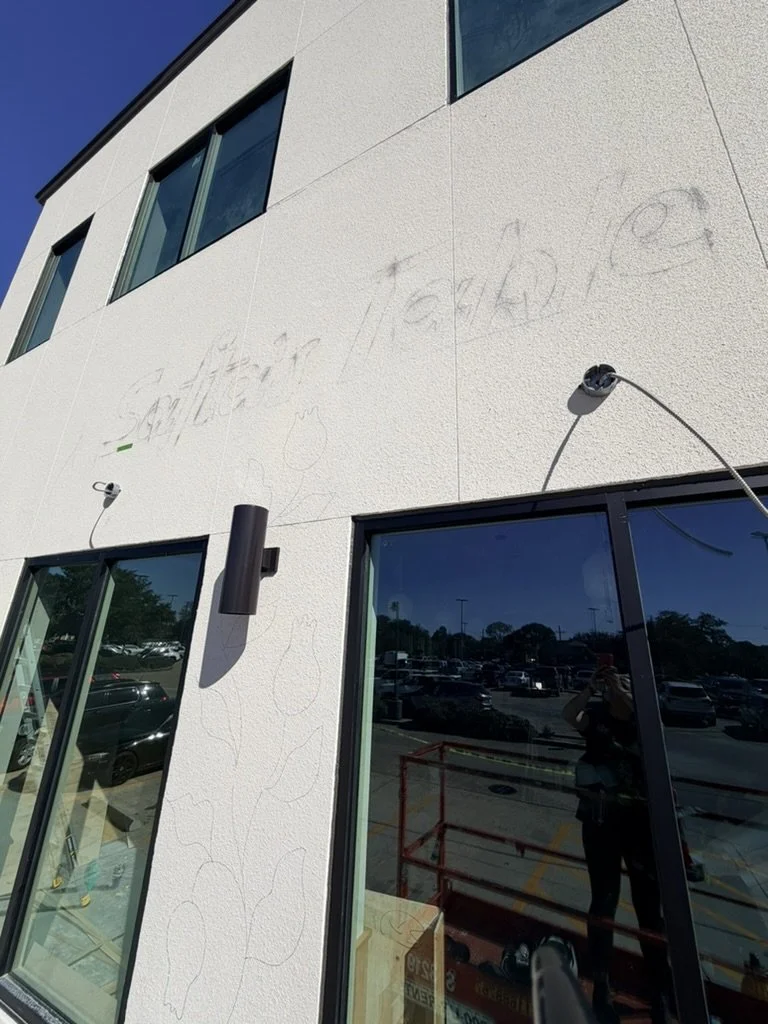
Time to pounce! Take your pounce pad and lightly dab it along your dotted lines. The dust will go through the tiny holes onto the wall and form light outlines for your design, easily transferring it to your wall.
Pandr Tip: Be careful not to “pounce” too hard in order to avoid clouds of dust cropping up. Blue is the best chalk color to use, but you can also use black or white, depending on what color the wall is already painted.Remove the template, take another step back, and inspect the marks. Make any necessary adjustments until you’re happy with the transfer.
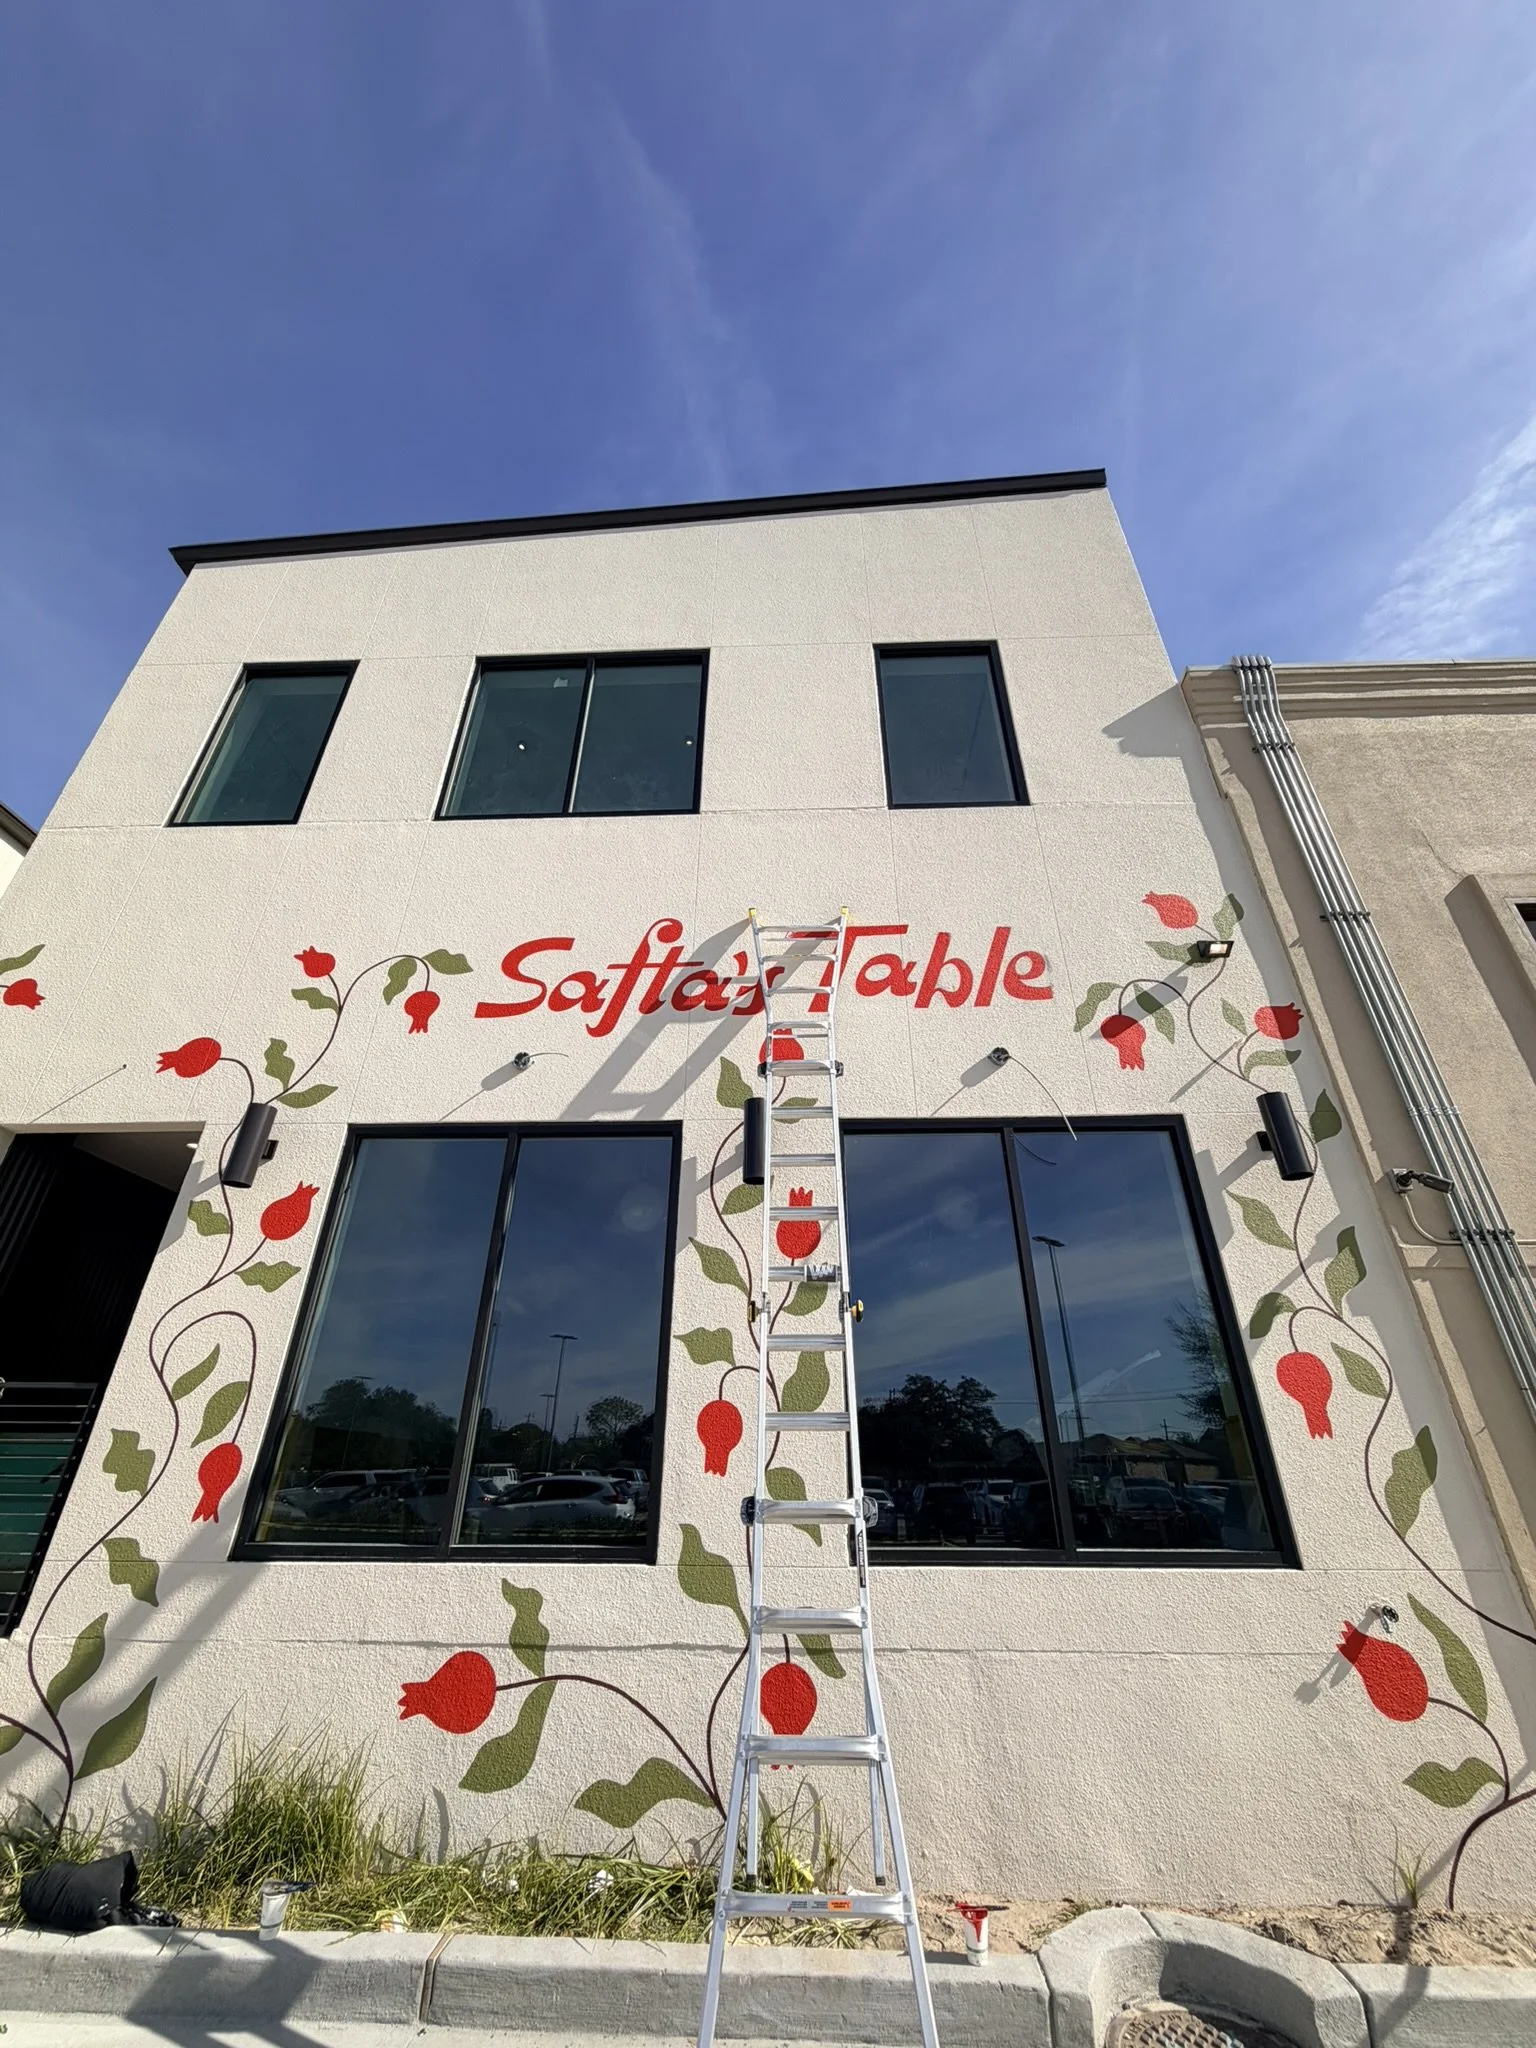
Voilà! Your pounce pattern has done its job. Now get to painting!
FAQ
How long do pounce patterns last on a wall before painting?
If you're outside, obviously weather plays a factor and they're not fun to work with in the wind. A big pattern may be easier with two people to lay out, but you'll take it down immediately after applying the chalk.
Can I reuse the same pattern on multiple walls?
Yes! As long as you protect it and store it nicely.
What if the wall is uneven or curved?
Pounce patterns are actually great for a curved wall because it wont warp (depends on what the vantage point is or if there's type or letters), but could be a better option than a projector in some cases. Using a pounce pattern on an uneven/bumpy wall might be tough though.
How do I store and transport patterns for reuse?
If you're like me, you fold them in half and keep them in your truck. Depends on how organized you feel like being! Just know chalk will be all over them so your hands will definitely get dirty for reuse.
Go Forth and Poke Some Holes ✨
At the end of the day, pounce patterns are one of those tools that can make your job a lot more efficient, especially when scale, precision, and repeatability matter most. Whether you’re tackling your first large wall or streamlining your process on client jobs, having a reliable transfer method in your toolkit can save you time, stress, and costly mistakes.
Like anything in the mural world, the magic is in the practice. The more you experiment with different surfaces, powders, and techniques, the more confident (and efficient) you’ll become! Take the time to get the hang of pounce patterns, and you’ll be skipping into the (painted) sunset arm in arm in no time at all.
Have you tried installing a mural with a pounce pattern? Any other questions you have about them? Drop questions, comments, or your hot pounce pattern tips in the comments!