How to Use a VR Headset to Paint a Mural (And Why It’ll Change the Way You Work)
VR headset in action!
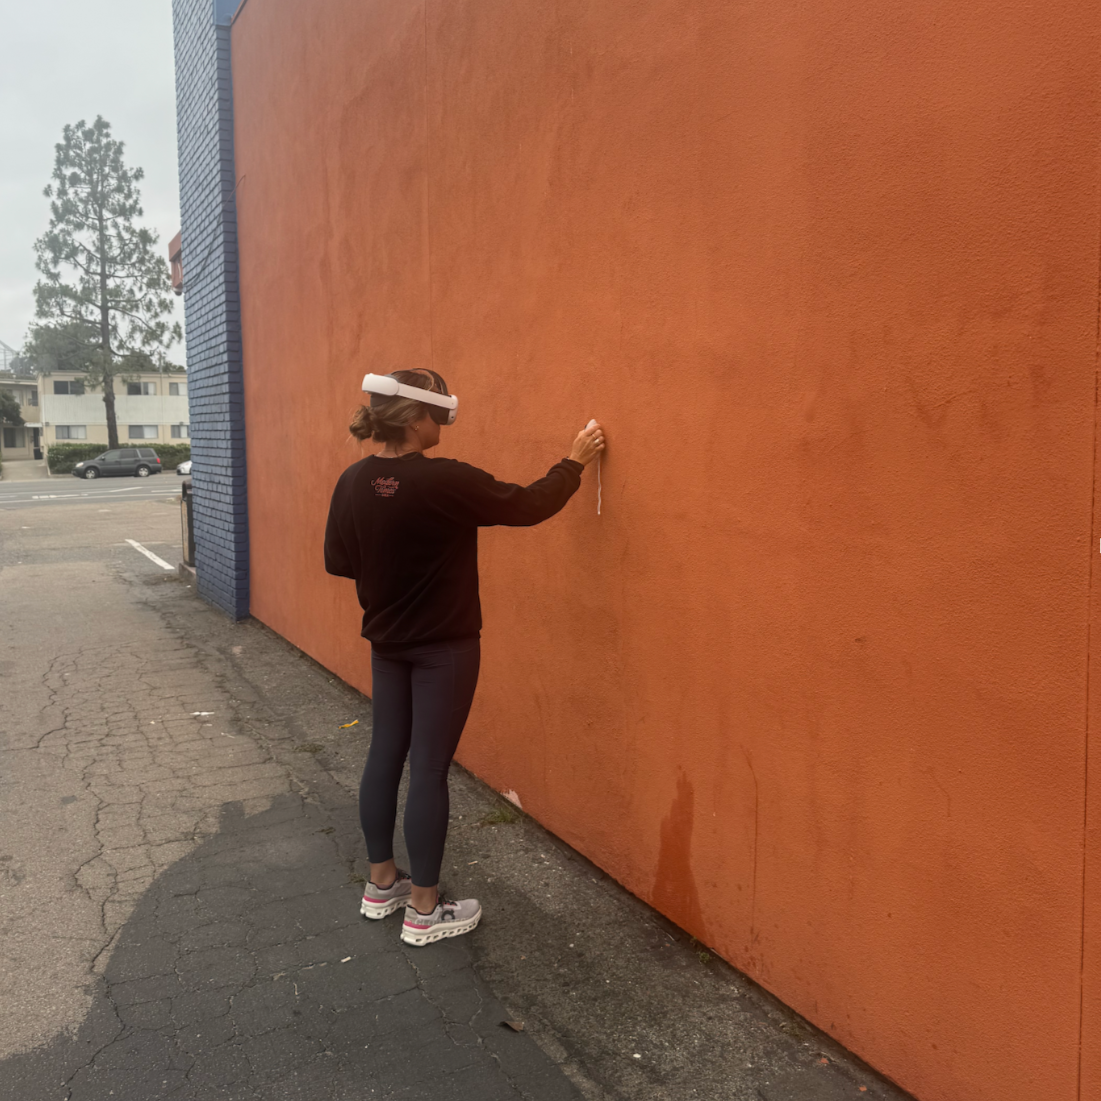
Upon getting my hands on a VR headset, the impulsive “just wing it” side of me was ready to dive right in and try it out on my next mural project. Thankfully, my business-owner brain stepped in and I decided to try my new tool out on a chalkboard wall at home first, before risking riding the learning curve on a client’s property.
And since we’re all about transparency here, believe me when I say there is a learning curve. Painting with a VR headset is not one of those plug-and-play tools, so don’t get frustrated if it takes a little bit of time to learn the ins and outs before it clicks… because once it clicks, it will be SO worth it.
For me, setup took about two hours from unboxing to first test run.
Here’s what the process looks like in the simplest terms:
Sign in via Facebook (I know a lot of us aren’t on Facebook anymore, but Meta makes you).
Create your avatar.
Get familiar with Metaquest inside the headset.
Download the Stencil VR app ($9.99 in the Meta store- more on this later) when you’re ready to trace your art.
It’s a handful of steps, and it does take a little patience so give yourself grace. Once you get the hang of it, it feels surprisingly natural.
After a couple of hours of practice on the safety of my chalkboard wall, I felt confident enough to take it into the wild, aka, at Wilson Creek Winery. The Wilson Creek mural was the perfect first test run: small enough that if I messed up it wouldn’t totally derail my timeline to paint over mistakes, but detailed enough that I could really put the headset’s efficiency to work… and did it DELIVER. The mural ended up turning out great- and the use of this technology saved me SO much time in mapping out the design, completely eliminating the need for a traditional projection method.
If you’re new to the idea of using VR for murals, you might be wondering: Why would an artist reach for a headset in the first place? Aren’t murals supposed to be old-school, hands-on, paint-under-your-fingernails kind of work? Yes, but also, we’re booked and busy and trying to get a lot of murals on walls out here!
If I had to choose the top three reasons VR will be a forever tool in my toolbox, here’s what I’d say:
Time saver: You don’t always want to wait until nighttime to use your projector to get the art on the wall for your mural. With the VR headset, lighting doesn’t make a difference. Being able to trace away in broad daylight offers so much flexibility.
Freedom from power cords: As long as your headset is charged, you’re set. (Though, pro tip: always pack an extra-long extension cord just in case. And don’t forget the extra battery pack!)
Safety: This one is huge - especially for my fellow women artists. Late-night projecting sessions in dark alleys or empty parking lots? No thank you. With VR, I can map out a mural at any time of day and feel safe while doing it. Honestly, even if this was the only benefit, it would be worth every penny.
Have I intrigued you yet? If so, keep reading. My goal in this blog is to walk you through the different types of VR headsets (including the one I personally recommend), how to set yourself up in Metaquest, and how to actually pin your art to a wall so you can start pumping out high-quality murals faster, safer, and with way less stress (and in doing so - get paid more money!!!).
Choosing a VR Headset
With so many different products on the market (plus this being such new technology) even deciding which VR headset to purchase can feel like a barrier to entry. Luckily for you, I already went down the rabbit hole researching the best investment for Pandr and can confidently recommend the Meta Quest 2 or the Meta Quest 3 (and I have no affiliation or partnership with them - it’s just truly what I think works).
I ended up going with the Meta Quest 3 from Best Buy, and threw an extra battery pack into the cart while I was at it. The battery pack is key if your art mapping takes more than two hours, which is almost always the case on larger walls (plus it comes with a fancy, more secure head strap than the original one). And while it may feel like an unnecessary extra expense at first, I highly recommend adding the warranty to your purchase. The one I got allows you to switch out the headset anytime within the two years following purchase if god forbid it breaks. Peace of mind is priceless with any sort of larger investment like this.
Setting yourself up in Metaquest
Once you’ve chosen your headset and have it in hand, it’s time to get set up inside the ~Metaquest~. This is where the fun part begins. After signing in and creating your avatar (aka your badass alter ego), spend some time getting comfortable moving around in the virtual world. Set aside some time so you don’t feel rushed and can play around freely until you get the hang of it. If you feel confident with the controls, it will make the mural mapping process way smoother later.
Once you’re ready to actually start laying out your art, you’ll need to download an app that makes it possible to “pin” your design to your mural wall. From what I’ve researched and learned from my chats with other muralists, the two best apps on the market right now are Contour App and Stencil VR. Both will get the job done, it’s just a matter of personal preference! I’ve tried both, and I’m currently using Stencil VR because I find it to be a bit faster. It’s been great, so that’s what I’ll walk you through here (with notes from my experience with the Contour App as well… the more you know!).
Pro tip: You’ll need WiFi to upload your design into the app, but once it’s in there, you don’t need WiFi anymore. I usually just email myself a PNG of the artwork, open Gmail inside the headset, download the file, and then upload it straight to Stencil VR.
Pinning Your Artwork to the Wall
Using the Meta Quest 3 to pin my design on a bedroom wall.
Drum roll pleeeeasse! Finally, it’s time for the main event: seeing your design come to life on the wall.
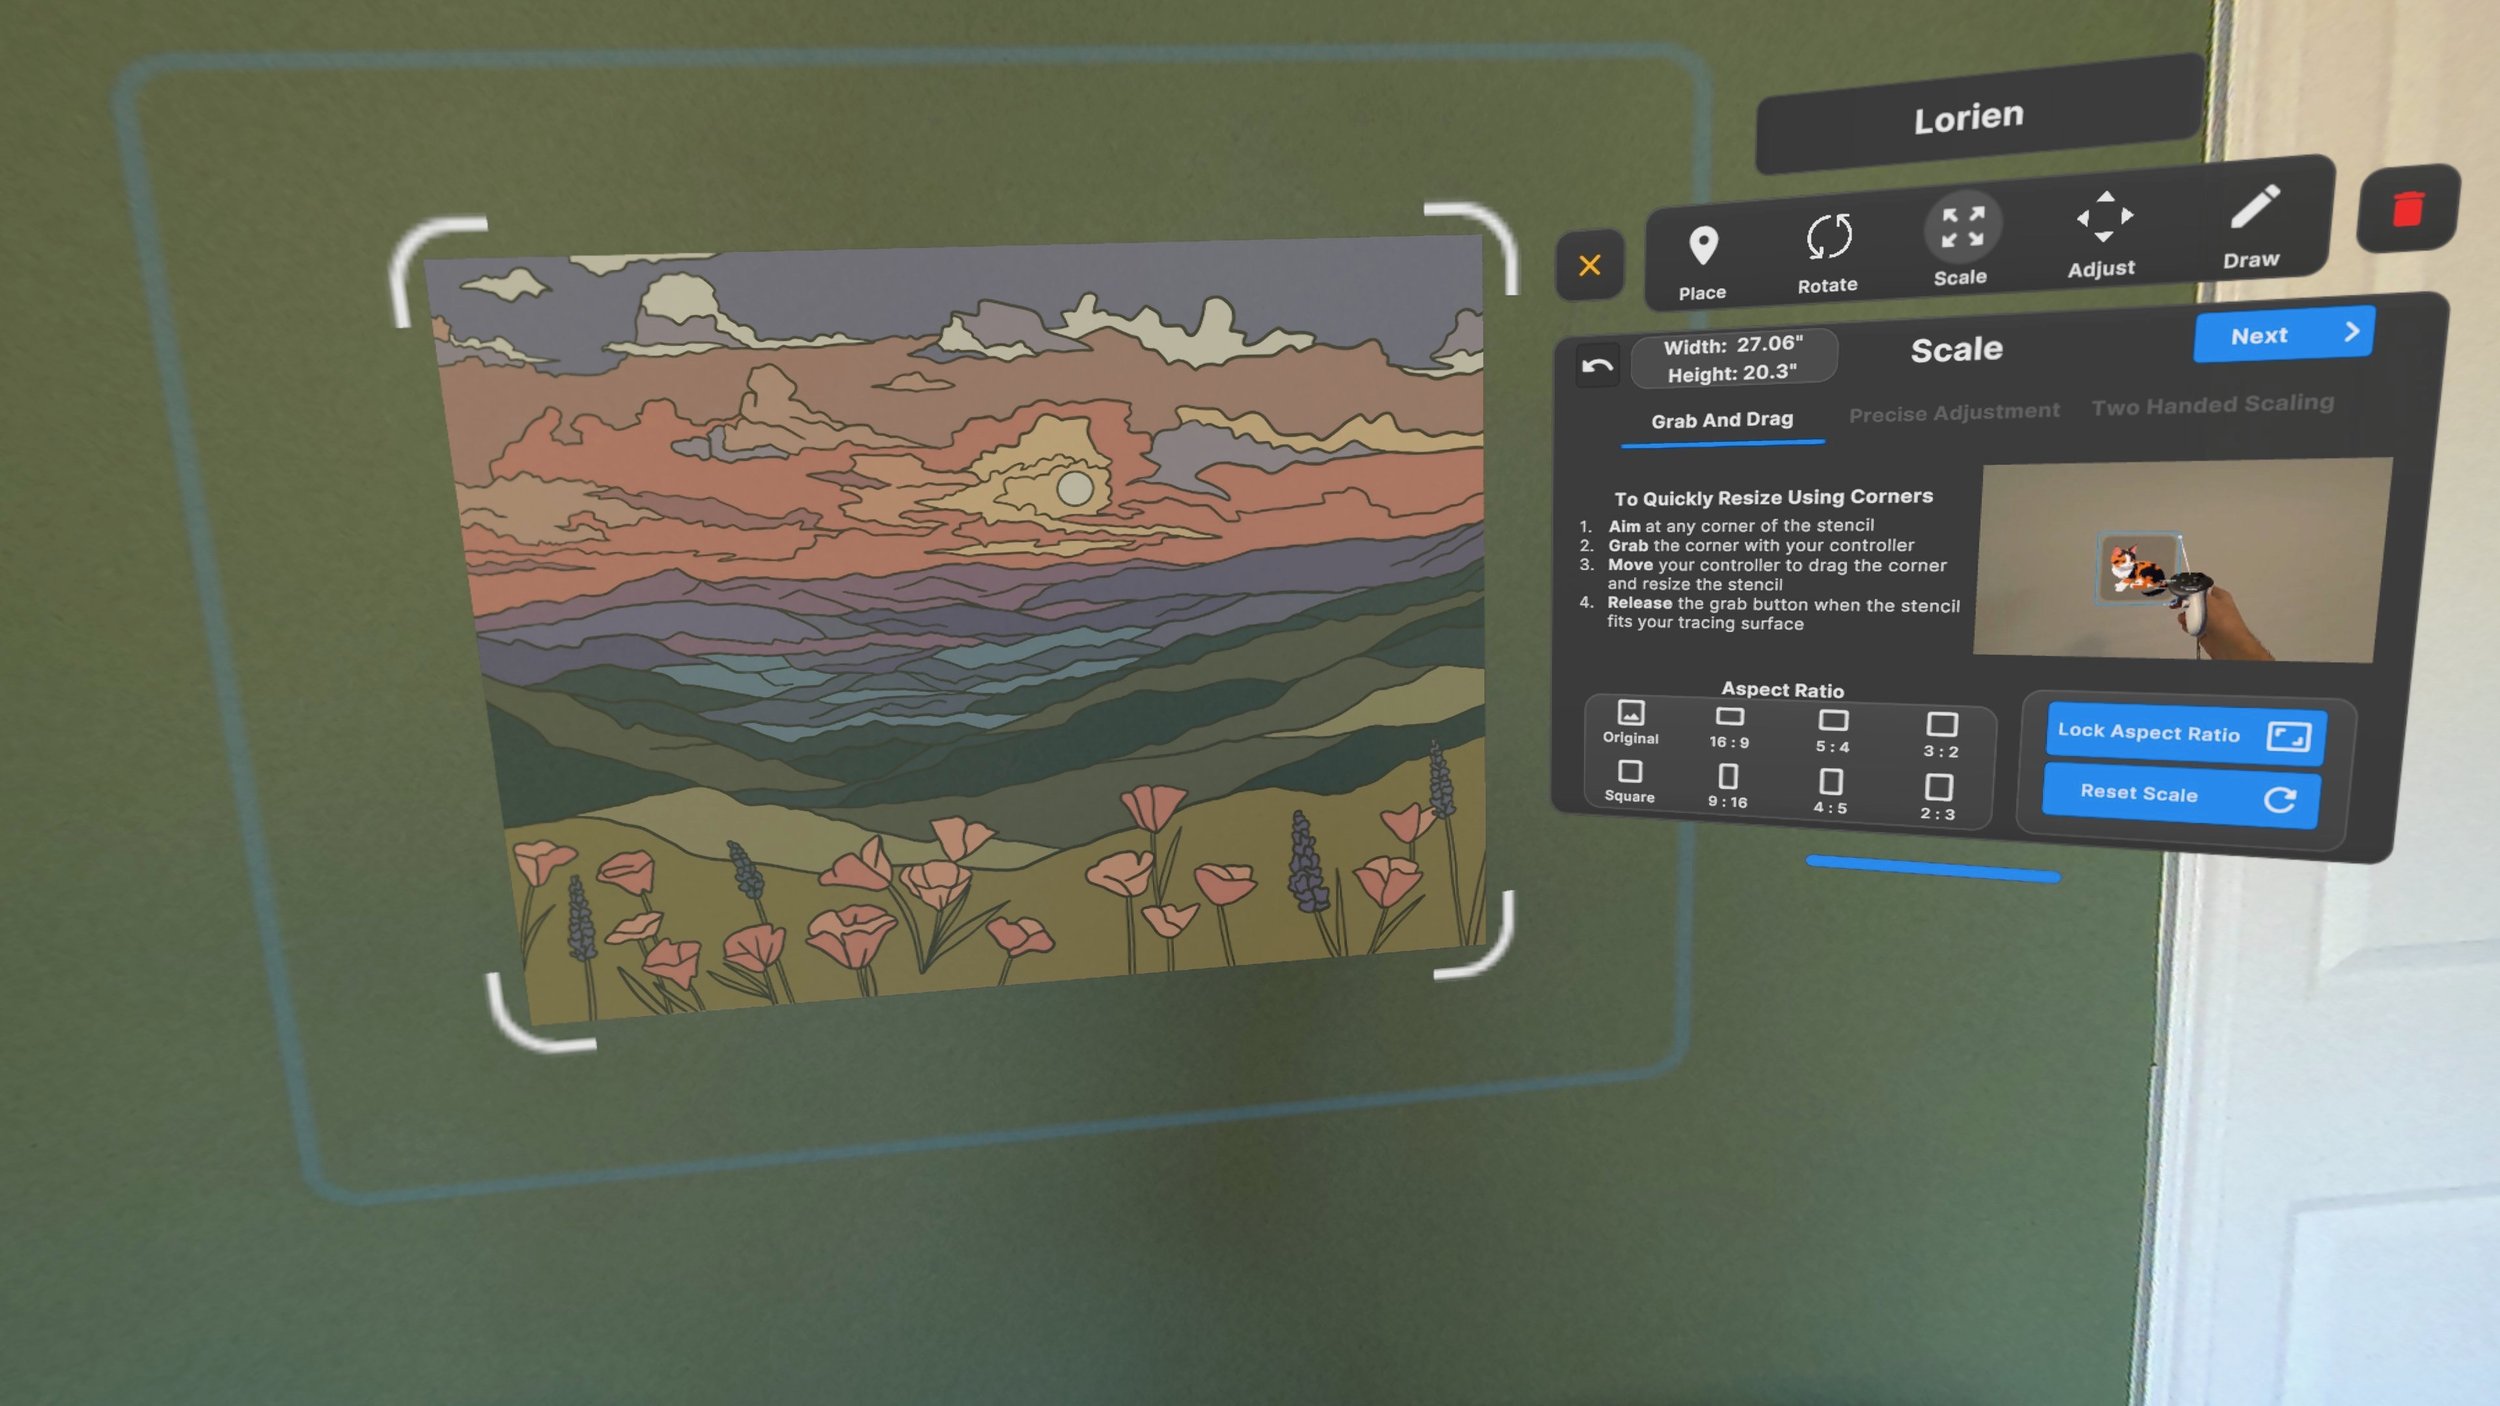
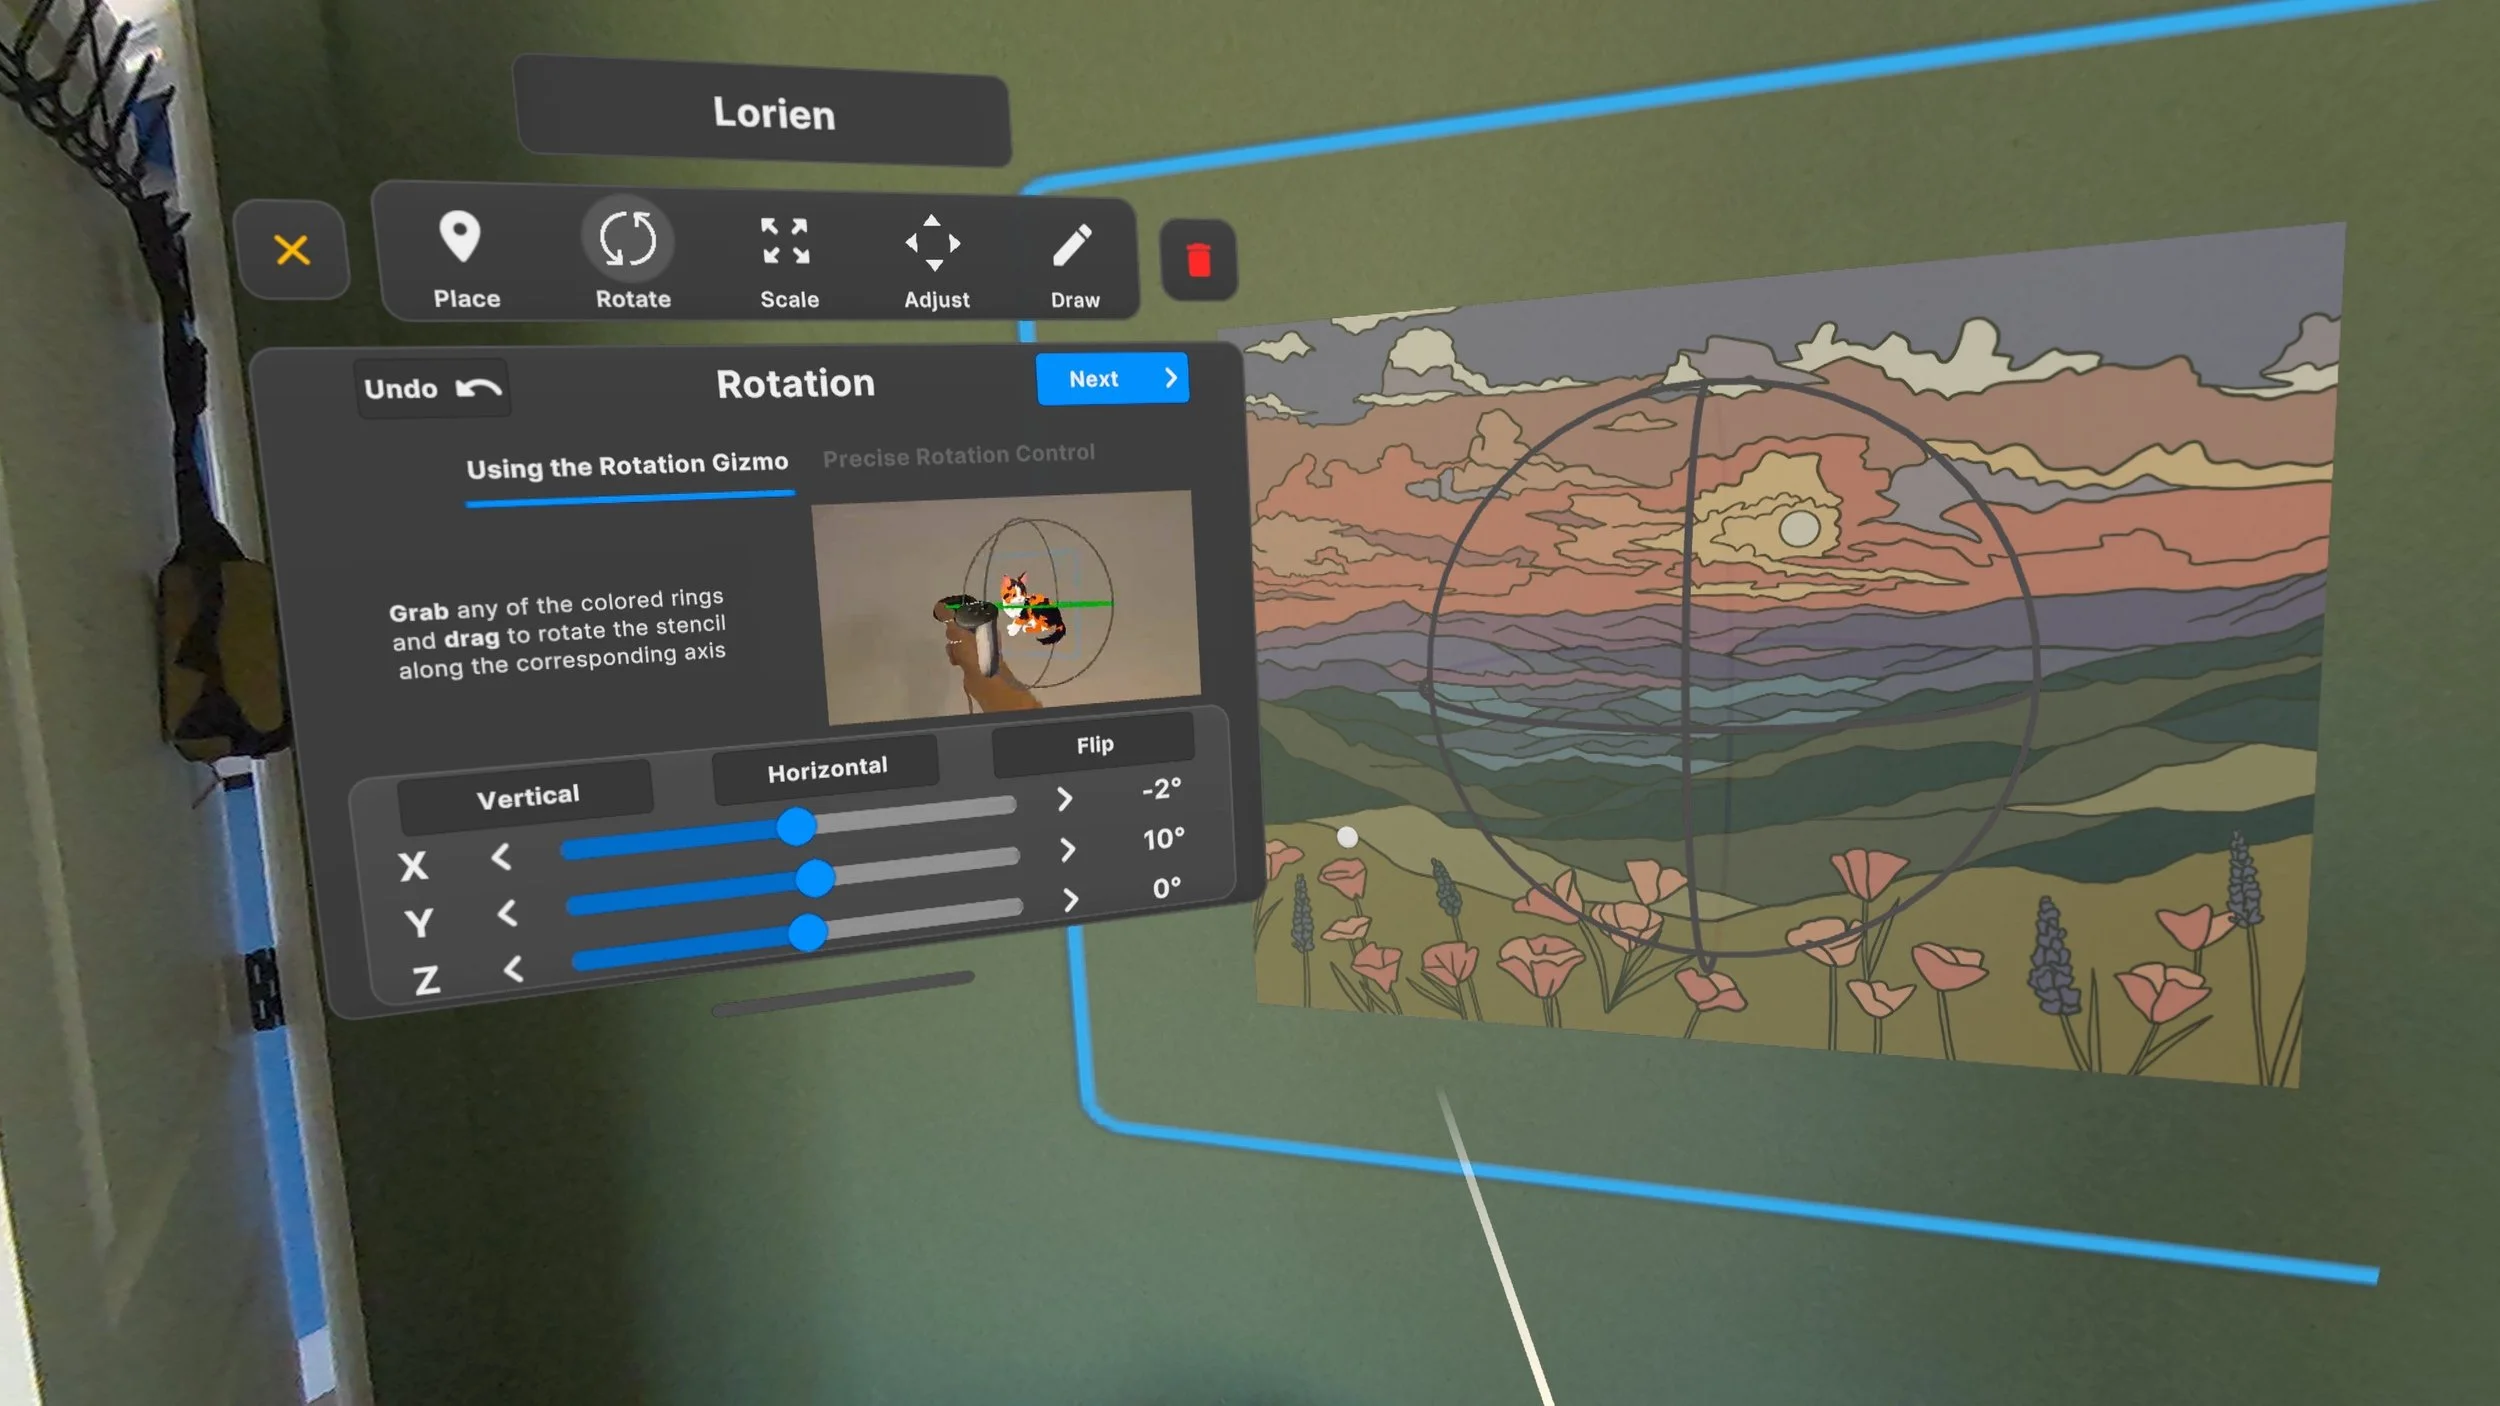
Open Stencil VR and upload your PNG or JPG to the Stencil VR website.
“Pin” your image to the wall inside the virtual space.
Adjust the scale, placement, and depth until it’s exactly where you want it.
Make sure you’ve measured your wall in real life and matched the digital version so proportions don’t get funky.
Once it’s lined up, you’re ready to grab your chalk and start tracing. For large-scale murals, you might want to map the design in smaller sections (similar to how you would with a projector) so you don’t overwhelm the space or risk losing your spot. I’ve found that with the Contour App, long sentences of type can get easily skewed. So if you're using Contour to map out a lot of text, I recommend breaking it up into smaller chunks- otherwise your sentence/phrase might look like it's on a diagonal and will waste a lot of your time.
Pro tip: If using Contour App, don’t take your headset off while adjusting. If you do, you’ll lose the placement and have to start all over (ask me how I know). In Stencil VR, you can take the headset off and on and the image will stay in place so it won't mess you up if you need to take a break for some reason.
Once it’s lined up, you’re ready to grab your chalk and start tracing. For large-scale murals, you might want to map the design in smaller sections (similar to how you would with a projector) so you don’t overwhelm the space or risk losing your spot.
Why VR Beats the Old-School Way
If I haven’t quite convinced you, let’s revisit all the reasons VR makes painting a mural so much better. Am I in the honeymoon phase? Maybe. But I truly think this relationship is going to stand the test of time.
1. It saves time.
Forget waiting for the sun to set so you can project. With VR, you can map your art in the middle of the day, on your own schedule.
2. It’s lighter and more travel-friendly.
Compared to lugging around a projector, the headset is way smaller, way lighter, and easier to pack.
3. It improves accuracy.
Because you can scale and test your design virtually, you’ll have way fewer surprises once you start painting. Complex architectural elements? Floor or ceiling murals? No problem.
4. It’s safer.
Again, this one cannot be overstated! Being able to work during daylight hours without cords and projectors means I’m not standing in dark parking lots with my back turned to the world. As a woman artist, that peace of mind is priceless.
I just wrapped a 2,400-sq-ft mural for Athletic using the Stencil VR app with my headset, and I can 100% attribute our speed to it. We divided the wall into eight “mini murals” and mapped each one out in VR using the exact wall measurements. Because we were working inside a functioning brewery (so no lights-off projector sessions possible), free-handing or doodling would’ve taken so much longer. With three of us painting, we completed the whole 2,400 sq ft in 3.5 days. Yes, the image can get a little wonky on the wall (just like with a projector) but once the general layout is pinned, you just fix what you need with paint. I even used the headset while operating a scissor lift (a little tricky, but totally manageable).
Tips for a Smooth Workflow

We polled other artists on Instagram to see how big they’ve been able to project using the VR headset. Pretty crazy to see how many people have successfully used the headset to install huge murals.
Double-check dimensions: Measure the wall in real life before you pin the digital image.
Use a measuring tape: Even with VR, I always confirm proportions on site.
Bring backup power: The extra battery pack will save you if mapping takes longer than expected.
Practice beforehand: Don’t let a client’s wall be your first test run. The learning curve is real, but you’ll get the hang of it.
Wear contacts if you normally wear glasses: The headset isn’t super comfy with glasses.
Avoid direct sunlight: The device doesn’t play well in bright, direct light. It definitely works a lot better in broad daylight than a projector does, but if you can find or add shade to your wall, that will certainly make it easier.
TLDR;
So here’s the deal: VR isn’t here to take away the magic of mural painting, it’s here to make the whole process smoother (and way less stressful). For me, it’s cut out the late nights, the tangled cords, and the waiting around for the sun to set, and replaced all that with more freedom to just focus on painting and getting into my creative flow. And honestly? It’s pretty fun.
If you’ve been curious about trying it, I hope this gives you the push you need to grab a headset and play around. Worst case, you spent an afternoon learning something new. Best case, you find a tool that saves you time, keeps you safe, and makes muraling even more enjoyable.
If reading this has you dreaming about a mural of your own (whether VR is involved or not), drop us an email. We’d love to bring your walls to life.
Have you used a VR headset to paint a mural? Are you interested in trying it? Why or why not? Drop us a comment with your experience - this is such new technology, we are genuinely curious if others love it as much as we do!